Posts

Update: delayed but not forgotten

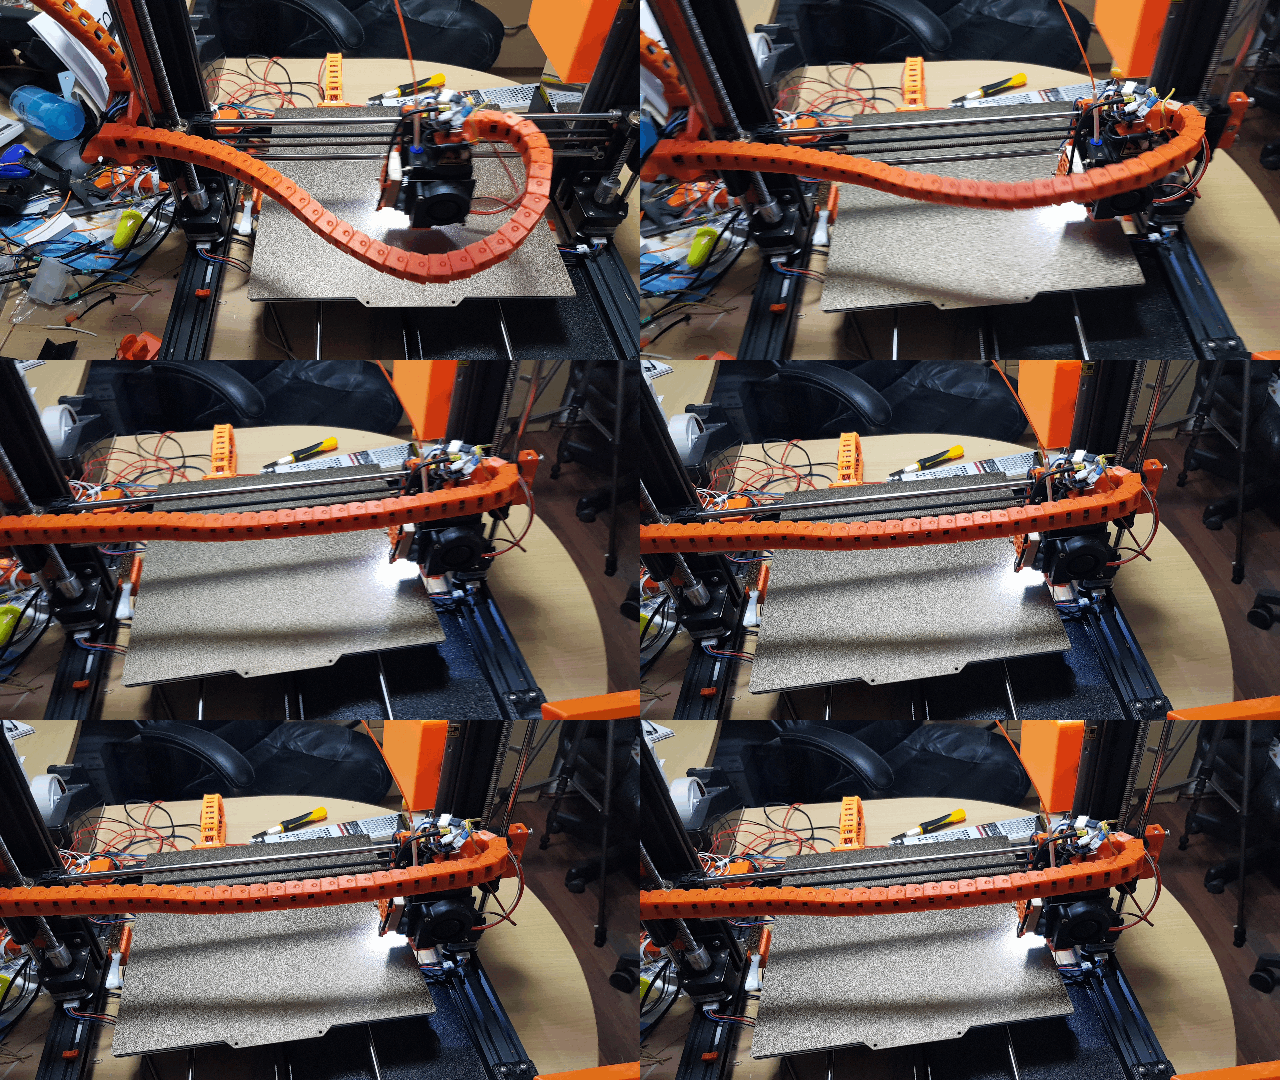
Those of you following this blog will have noticed that I've gone a little quiet for a while. This is due to a combination of factors. First, I am very busy with work at present and, secondly, I have a backlog of things which I need to print for jobs around the house. I can't print with the printer at the same time as rebuilding it. To give an update on progress: I still need to rejig the X-axis cable chains to rotate them by 90° The fanless PSU seems to be working very well indeed and makes a huge difference to the noise of the printer The foam insulation on the base of the HBP also seems to help a lot and works far better than I'd expected. Heat up time is improved significantly and excess cooling between prints is also reduced.  I have a set of Z axis pull-rods to install for extra rigidity but these need to be modded to fit the 350mm Z height.  I also really want to move to the latest version of Marlin to address a few annoying niggles which I know are present in 2.0.5.

Update: a re-design, reducing heat escape and a weird problem

Image
I haven't updated for a few days as I've been busy with other things. However, I've not been ignoring the problem completely.  My next priority is to redesign the orientation of the X-axis cable chain as I described in my last post. Clearly I should have done it that way initially and I'm now kicking myself for deciding against it and going with the seemingly more simple path that I did. Having said that, it shouldn't be too arduous to redesign it and replace the parts. I just need to find a little time. As part of my ongoing testing, the printer developed a very weird problem. Ironically, I had just completed a very good tuning of bed level and managed to print a very good example of the test print I designed.  The very next day I tried to print another quite wide print and the right-hand side of the print just disappeared, almost as if the bed level had risen sharply on that side. I rechecked the level numerous times and everything seemed OK. I decided that the ne

Update: X and Z axis cable chains - a rethink

Following advice from a number of quarters, I have decided to temporarily remove my design for the X/Z-axis cable chains. It has been suggested that the orientation of the X axis chain is not strong enough for long-term use, so I plan to modify the design to rotate these by 90° and then republish.  Obviously I'm aiming at something which will be reliable long-term and if this isn't going to cut the mustard then I need to replace it. I plan to start on this shortly and will re-release once it's completed.  On a more positive note: the reprint of the storage drawers has worked well, with the dimensional accuracy problems addressed, they do indeed now fit two abreast. 

New release: X and Z axis cable chains

Image
I have finally completed the release of these combined cable chains. This has been something of a passion project for me as the original X carriage umbilical was one of the areas of the system which I really didn't like. It was either too short or too long or would get in the way of the print.  This particular design has taken quite some time as I had some very specific requirements which meant that I had to design each element from scratch. This included the chain links for which I had a number of requirements Easy to print No supports needed 20mm wide to match extrusion on Z axis Removable and replaceable in situ I have managed to achieve all of these goals with my design, I believe. The links are then used to create the two chains, connecting via custom mounts at the base of the Z axis, the top of the X carriage and joined together in a dual-axis bracket mounted against the X axis stepper.  For more information, please see my blog page on this project element.  The models are a

New release: Storage Drawers

Image
I have finally (after an awkward false start) been able to release my solution for storage drawers. I have discussed them enough previously that I needn't go into too much detail. Suffice it to say that I'm very pleased with the final design which is a fully slot-together system which builds a robust and useful system. I have been using the prototype version for quite some time now and they are an excellent place to store my snips, feeler gauges, allen keys etc.  They fit into a free space which doesn't get in anything's way and they are easy to assemble. The individual parts just slot together providing a strong solution with a minimum of material and which needs no supports. If you'd like to print this for yourself, the models are uploaded to Cults3D .  Visit the main content pages

Update: X and Z axis chains and storage drawers

Image
This is a brief update and progress and information about a new release of the X and Z axis cable chains and the real (finally) release of the storage drawers. To the last point first: I took some further measurements and the problem I had with fitting a pair of drawers side by side as they were designed was not at all due to tolerances, as I'd first thought, but rather because of some significant dimensional inaccuracies in my first test build. In hindsight, the print was done quite early in the build, before I'd tuned very much at all. So, I hope to release the drawers very soon after the false start before.  Similarly, I'm just creating a time-lapse of a print to demonstrate the new cable chains in use in earnest. I plan to release this alongside the models themselves very soon too. Another thing I have now been able to do is connect the fanless PSU. Not that it should be a huge surprise, but the difference in noise levels is very significant indeed. The fan in the stand

Update: Back together, but there's that noise...

Image
So, I had completed the cabling in the chains and they were ready to put to the test. I connected all of the connections at each end and powered on. I had full X and Z movement and everything seemed OK.  So, after redoing basic calibrations, I started a test print. Everything seemed OK and then suddenly there was a loud ticking noise. I traced this to what I thought was the X stepper. It seemed too high-pitched to be it skipping steps, but it was certainly there and it was only making the noise under X movement.  So, I tweaked the X motor current up a smidge - to no avail. Annoyingly, it wasn't happening all of the time, the printer seemed to home and perform levelling without a problem, but it would randomly start when printing. I wondered whether the changes had caused something to seize on the carriage, so I loosened the belt and moved the carriage. It moved fine.  I re-tightened the belt and tried again. The problem persisted. On listening more closely, it actually sounded more